


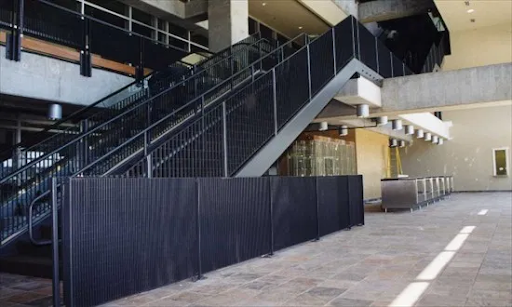
A commercial handrail needs to provide reliable support while fitting the building’s architecture. Understanding ADA handrail requirements early helps specifiers coordinate dimensions, mounting details, and transitions before fabrication begins. At MFR Corp, we approach architectural railing projects with attention to both function and appearance.
For architects, contractors, and building owners, a clear checklist can help prevent overlooked details from becoming field corrections. Below, we explain the principal federal criteria and the coordination questions we recommend addressing when developing a commercial railing specification.
-
Establish Where Handrails Are Required
We recommend identifying covered stairs and ramps before selecting a railing style. Under the federal standards, stairs forming part of a required means of egress generally fall within the stairway provisions, subject to specific exceptions. Covered ramp runs with a rise greater than six inches require handrails.
Where required, handrails generally belong on both sides. Assembly areas have specific exceptions, so we recommend checking the applicable provisions rather than applying one arrangement everywhere. An elevator elsewhere in the building does not automatically eliminate handrail obligations at egress stairs.
For specification planning, we suggest documenting:
- Each stair flight and ramp run requiring handrails
- Interior and exterior locations
- New construction versus alteration conditions
- Applicable accessibility standards and adopted building codes
This location schedule gives the design team a shared reference throughout detailing and review.
-
Separate Handrail and Guard Functions
We distinguish the graspable handrail from the protective guard during design coordination. A guard helps protect an open edge; a handrail provides a surface someone can hold while moving.
Handrails may attach to guards when the resulting installation meets the applicable criteria. A decorative top rail, however, should not automatically be treated as the required gripping surface.
We recommend identifying each component clearly in drawings. Doing so helps prevent a visually coordinated railing assembly from leaving the actual handrail profile, elevation, or attachment method unresolved.
-
Verify Height and Gripping Profile
The federal standards place the top of the gripping surface between 34 and 38 inches, measured vertically above stair nosings, ramp surfaces, or walking surfaces. The height must remain consistent.
Profile dimensions also matter:
- Circular profiles: Outside diameter between 1¼ and 2 inches
- Noncircular profiles: Perimeter between 4 and 6¼ inches, with a maximum cross-sectional dimension of 2¼ inches
We recommend showing both the profile and its elevation in project details. A general note identifying a railing as accessible does not communicate enough information for fabrication. Dimensioning from the finished surface also helps coordinate flooring thickness and other architectural finishes before installation.
-
Preserve Clearance Around the Grip
Handrail gripping surfaces need at least 1½ inches of clearance from adjacent surfaces. Tops and sides must remain unobstructed, and obstructions beneath the gripping surface cannot exceed 20 percent of its length. Horizontal projections generally need at least 1½ inches below the gripping surface, although Section 505.6 allows specific exceptions.
We recommend reviewing bracket geometry alongside the rail profile. Wall offsets, attachment plates, and nearby panels can affect how someone reaches around the handrail. Checking these relationships in a section detail is more useful than reviewing the rail diameter alone.
-
Detail Continuity Through Flights and Turns
Required handrails must remain continuous along each stair flight or ramp run. Inside handrails at switchback or dogleg stairs and ramps must also continue between flights or runs, subject to applicable exceptions.
We encourage specifiers to resolve landing connections before approving shop drawings. Corners, changes in direction, and post locations deserve particular attention because they can interrupt an otherwise straightforward assembly.
A plan view paired with an elevation helps communicate the intended path. We also recommend identifying transitions between wall-mounted and freestanding sections so those connections receive the same attention as the main runs.
-
Check Extensions and Returns
Extensions give users support beyond the sloped portion of a stair or ramp. Their required geometry differs by location:
- Ramp ends: At least 12 inches horizontally beyond both ends
- Stair tops: At least 12 inches horizontally, starting above the first riser nosing
- Stair bottoms: Continue at the stair slope beyond the last riser nosing for a horizontal distance of at least one tread depth
Extensions must return to a wall, guard, or landing surface, or continue into an adjacent handrail. Specific exceptions cover inside turns, certain assembly conditions, and hazardous extension configurations in alterations. We recommend dimensioning extensions individually rather than using one typical detail for every condition.
-
Coordinate Nearby Doors and Circulation
A correctly sized extension can still create a coordination problem near an entrance. Required door maneuvering clearances must remain free of overlapping objects, including handrails. Horizontal extensions also need review under the applicable protruding-object provisions.
We suggest checking these details on the same plan as door clearances and pedestrian routes. Reviewing them together makes conflicts easier to identify before fabrication. For renovation projects, we also recommend recording existing dimensions early. Field measurements can reveal constraints that schematic drawings do not show.
-
Specify Surfaces, Attachments, and Review Documents
Gripping surfaces and adjacent surfaces must have rounded edges without sharp or abrasive elements. Handrails also must not rotate within their fittings. We recommend including mounting substrates, anchorage details, finish selections, and required structural criteria in the specification package. Structural loads and guard requirements need separate coordination with the applicable building code.
Our METALCO railing systems include Grigliato, Select, and custom options. We also provide railing CAD resources to support project planning. Additionally, we encourage project teams to review shop drawings against the location schedule and approved details, then verify installed dimensions before closeout.
-
Plan for Long-Term Upkeep
We recommend including inspection and cleaning guidance in the project handoff. Building staff should know how to identify loose connections, damaged finishes, or changes that obstruct the grip. Keeping maintenance information with the approved drawings helps future repairs preserve the original design intent and supports consistent upkeep throughout the building’s service life.
Bring Accessibility into the Design Conversation Early
Meeting ADA handrail requirements depends on coordinating the complete installation: grip, height, clearances, continuity, extensions, and surrounding space. We recommend resolving these details while design choices remain flexible.
At MFR Corp, we work with project teams on standard and custom architectural steel systems. Contact our team to discuss your commercial railing project and the details your specification needs to address.